Exploring options to create low-cost pressure-sensors
To detect rider aids we need pressure sensors, for example to detect leg position and pressure, as well as the weight distribution of the rider in the saddle.
I first looked at this article that suggests that conductive fabric and static bags can be used to detect pressure. The paper claims that the resistance of static bags is in the 10K to 1M Ohm range. However, elsewhere I see that the resistance is actually in the 1G - 10G Ohm range, making it impractical. I simply can't get my multi-meter to register any resistance, even when pressing probes hard into the static bags.
This is annoying, because the idea is simple and great, and can be further simplified and cost-reduced by using conductive electric fence ribbon in place of the expensive conductive fabric layers. Some brands of electric fence ribbon even have multiple metal threads that don't touch each other along the length of the ribbon, which would allow a single length of ribbon to sense pressure a different regions along its length, by limiting the resistive medium to contact only particular metal threads on the ribbon.
Here is a sample of the electric fence ribbon kindly donated by our riding instructor. You can see the metal threads that run length-wise through the ribbon. But each thread does not touch any other, making it very convenient for measuring resistance without needing to add extra layers:

But given that static bags aren't conductive enough, how can we solve this to allow the production of extremely cheap and easily replaced pressure sensors?
One approach would be to measure capacitance instead, and place a compressible layer between two fence ribbons, to effectively measure the distance between the ribbons. But I'm not convinced that that will provide a particularly linear or sensitive response curve.
What we ideally need is a material that has a resistance in that 10K to 1M range, so that with increasing pressure, we can see the resistance of the circuit decrease over a usable range.
There are also manufacturers of conductive silicone rubber, but there, the resistance is too low (~5Ohm / cm).
Conductive rubber switches, such as used in game consoles are another option, although still with rather low resistance. However, I have seen from previous experiments with them for the MEGA65 handheld, that resistance does vary with pressure, typically in the ~100Ohm range. There is a minimum pressure to get these buttons to contact, because of their design as switches. However, that's probably not a big problem for our application. I also have some of these hanging around the place for the MEGA65 handheld, so I can give those a quick try.
The ones I have here are D-PAD button sets originally meant for GameBoy hand-held game units:

With very light pressure, I see a resistance of about 250 -- 300 Ohms, while under heavy point pressure with multi-meter probes, it drops to as low as about 70 Ohms. That's probably a usable range. The only issue is that the conductive rubber part is too small to bridge the wire threads in the electric fence table. But it tells us that the carbonised rubber that they use is a candidate. Let's see what we can find online in terms of cheap sources. I might also just check if bicycle tubes happen to be slightly conductive...
Hmmm.. I didn't find a bike tube immediately in the shed, so I just randomly probed the tread of our car and trailer tyres... and they are conductive in the 10M -- 200M Ohm range, again nicely pressure sensitive. It turns out that this is common to almost all car and airplane tyres, so that static charges from friction can't build up and lead to sparking. I couldn't find any really clear authorities on this, but did find a bunch of slightly indirect references, like this patent for improving the conductivity of car tyres, or this blog post that talks about how carbon black is responsible for the conductivity.
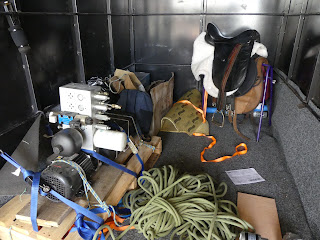
Well, we already use car-tyres in the horse, and they are even conveniently where they would need to be to measure leg pressure... This will be quite funny if it turns out to work!
Next step is to attach some probes to a piece of electric fence ribbon, and set it up so I can squish-test it against our car tyres. I need to put an insulative backing on it (or use something to apply pressure to it that is an insulator), because the resistance of my fingers is much lower than the resistance of the car tyres.
First problem, the wires in the electric fence ribbon I have here seem to absolutely not want to be soldered to. They are very thermally non-conductive. I'm guessing that they are stainless steel. Looking further, it turns out that you need at least phosporic acid to de-oxidise the surface of stainless steel, and a fairly high concentration to be effective in reasonable time. The other alternatives were truly frightening, such as hydrofluric acid, which apparently enters through the skin and will then happily destroy all your bone marrow -- so I'm not going to try that.
Anyway, I'm going to avoid the need to solder the stainless steel right now by just holding the threads using some alligator clips, so that I can in turn attach the multi-meter probes without me having to hold them while I do the testing. Something like this:

Now that I've made up my little test rig, and set to work trying it with the spare wheel for our car that is sitting in the shed... and that tyre (a Yokohoma Geolander) isn't conductive. To be honest, it's a pretty old tyre, close to 20 years old, so it is possible the conductive rubber on tyres thing might have only come in in the meantime. I'll have to see if I can't pull the spare tyre off our trailer, that I did confirm is conductive. Otherwise, I'll have to remove the carpet "hide" off of the mechanical horse frame I have been working on, to get to the tyres underneath.
Tyre from the trailer was easy enough to retrieve (probably need to tighten the bolts a bit more when I put it back on, in fact), and with a bit of fiddling, I was able to get readings from it, like this:

It might be that the fence ribbon has too little contact area and contact force, though, in which case I'll need to think of another low-cost alternative. Maybe the sharp bumpy side of a cheese grater, for example, that would have lots of points to dig into the tyre with. But first I'll try cleaning the tyre up, and seeing what I can do with the fence ribbon.
Another approach will be to buy a sheet of conductive rubber, e.g., from here, which has about 50Ohms / mm resistance, if I understand correctly. However, whether it will provide responsivity to pressure I don't yet know -- but it's probably worth the experiment.
Looking for a local supplier here in Adelaide, I discovered one thing, and was reminded of another. First, when Jaycar's website is under maintenance, the landing page has a nice built-in space-invaders game. Second, I had forgotten about conductive foam used to hold computer chips. That seems to me to be rather likely to have pressure-sensitive resistance, as the more the foam is squished together, the more paths there are through it. I have some of that in the shed I should be able to quickly probe.
Now that's interesting: It appears to have a natural resistance of about 1MOhm, regardless of distance between the probed points, and as suspected, because it's squishy, varying the pressure on it does vary the resulting resistance, from around 60MOhms for very light pressure, down to about 1.2MOhm with quite high force on it. The pieces I have here are a bit old and crumbly, or are full of chips, so I'll have to buy a new piece from Jaycar tomorrow morning, I think, and try it out.
Hmm... Anti-static mats should also work. I have one of those, here, too. Interestingly, the front of the anti-static mat doesn't work (resistance >200MOhms), but the rear has a resistance of about 1MOhm. With that on my bench top, I could easily slip the fence ribbon between it and the wooden desk, and try applying various degrees of pressure to it. It does work to detect, but with a fairly high minimum pressure. Also, it has only a quite narrow pressure sensitivity range, so I don't think it will be a very good option. I'm interested in trying out a new piece of anti-static foam tomorrow, when Jaycar are open.
I've picked up the anti-static foam from Jaycar this morning, and it feels like it has potential:

The foam is quite stiff, but still compressible. With multi-meter probing it has resistance of a few hundred K Ohms. Assembling the test rig was very simple, using the alligator clips from yesterday:

I just placed the foam either on top or below the electric fence ribbon, and under my anti-static mat, just to give an easy surface to push again. Not surprisingly, the resistance was lower, when it was ribbon, conductive foam and solid desk, compared with putting the conductive foam above the ribbon, so that it was partially cushioned by the anti-static mat on top. But either way, it exhibits a wide range of resistance. Even sitting on it and moving my weight around showed a variety of resistance levels, which bodes well for using the same technique for measuring rider balance in the saddle.
Here I am putting some light pressure, for about 14.5MOhms:


So this is really looking like a good option. The panel of foam is only AU$15, so it's acceptable cost-wise. I will need to make a wide-range resistance meter that I can control from an FPGA board or similar, as well as figure out how to bind the ribbon and the foam together, and then get the electrical connections.
Right-oh. I have the conductive foam here now, and have cut a couple of pieces, trimmed a piece of the electric fence ribbon and used some thin sheet copper to make terminals to connect to the stainless-steel wires in the ribbon without having to solder the stainless steel itself.

This was sandwiched between the two layers of conductive foam.

I put insulation tape on both sides of the copper terminals, so that they don't form an immediate low-resistance contact with the foam.

If this is left out, then it remains pressure sensitive, but to much lower levels of pressure -- a feature that I might take advantage of, e.g., for sensing rein pressure in the "mouth". in that case, it probably doesn't even need the electric fence ribbon, as the terminals are doing the hard work.
I then loosely stitched the resulting sandwich together (with insulation tape on both sides of the terminals), so that it wouldn't fall apart (making sure it was still open-circuit):

and put it all in a little plastic bag with connections for ease of handling:

Sensitivity can be further reduced by using only one layer of conductive foam, rather than a double-sided sandwich. This should help in particular, where the overall pressure is quite even, which tends to result in a lower resistance with less pressure. I should make one up with the half-sandwich arrangement for ease of comparison.
The maximum pressure that it can discriminate with the double-sided sandwich is still too low for a saddle sensor, although probably fine for a leg aid sensor, and quite possibly also for a mouth rein sensor.
In short, we have something now that can meet some of the use-cases. So I will work on making something that can read such as sensor. I'll use an Arduino because they are easy to get hold of and relatively inexpensive. I've gone for a higher-end wifi-enabled model, so that I can get remote access to the readings to aid development.
The main challenge here is that the impedance of the signal will be too high for the ADCs on the Arduino. Fortunately, plenty of people have worked out ways of doing this, ranging from capacitors to switchable resistor ladders, because there are other sensors that exhibit extremely high impedance, such as pH sensors.
The MAX406 is specifically designed with this kind of application in mind, so I will order a couple, and follow their nice simple design note for this, and see how it goes. Interestingly, the MAX406 should be sensitive enough for very high resistance sensors, so directly measuring the resistance of the fence tape on the tyre treads may well be back on the cards. We shall see!
Anyway, that's probably all I can usefully do on this until the MAX406s arrive. So I might tackle some of the other parts of the system in the meantime -- like thinking about how to make the thing move.
It's now a couple of weeks later, and the MAX406 ICs have arrived. I ordered a few hole-through DIP packages for prototyping, as well as some SMD ones with wide enough pin spacing, so that I could hand-solder them, if I design up a custom PCB.
This is the circuit we need:

From the datasheet, I can see the following pinout:
1 - NULL
2 - IN-
3 - IN+
4 - V-
5 - NULL
6 - OUT
7 - V+
8 - BW

BW should be connected to V- for compensated mode, that limits bandwidth to about 8KHz, which is plenty for us. Or alternatively to V+ to run in decompensated mode to give 40KHz bandwidth, which is certainly more than we need.
Our sensor will replace the pH probe in the above circuit.
I think that means we have all that we need to prototype this up on some breadboard now.
I got interrupted on this task with going back to work, and then chasing up a great opportunity for an affordable hydraulic power pack with all the things I need on it, that will be the subject of another rather epic blog post -- as the logistics turned out to be quite challenging to get it shipped over.
I tried to use Fritzing to draw up the simple circuit, but for some reason it keeps trying to add imaginary connections across the sensor. So I am just going to work out the netlist by hand:
MAX406 pin 2 (IN-) to MAX406 pin 6 (OUT), Low Impedance pin 1
+3.3V to MAX406 pin 7 (V+), R1 pin 2
GND to MAX406 pin 4 (V-), R2 pin 2
SENSOR pin 1 to MAX406 pin 3 (IN+)
SENSOR pin 2 to R1 pin 1, R2 pin 1, Low Impedance pin 2
I've wired that up on my breadboard:

The black thing in the foreground is the sensor, and the circuit we care about is on the near-left corner of the breadboard. There are a few other ICs and components parked on the board, which can be safely ignored.
This then led me down an interesting garden path, where it seems that there is more 50Hz signal from the coupling of mains than there is of the signal from the sensor. The 50Hz signal -- because the op-amp is designed for high-impedance inputs -- is often having a really large amplitude -- up to around 40V.
However, the average signal level is rising and falling more or less in proportion to pressure. It's totally un-calibrated and probably non-linear, but that's okay, since a real horse probably senses changes in pressure more than absolute pressure -- especially for things like leg and mouth aids. Balance of pressure in the saddle forwards/backwards and left/right might need some a different approach, but we'll worry about that when we get that far.
I did in the process of this discover a problem with the way that I assembled the sensor to begin with: I crimped the copper sheet onto the ends of the horseguard electric fence tape, and then soldered onto that. This of course melted the plastic part of the tape, which then basically setup a nice insulating layer between it and the pads, causing very twitchy and temperamental behaviour:

I discovered this when taking it apart, because I had assumed that it was just making bad contacts, and needed a better means of contact between the copper sheet and the stainless steel threads -- which was probably also true, anyway.
To solve this, I invested the princely sum of $3.20 on a packet of 5 fine stainless-steel wire dish washing scrubber pads. The brand isn't important, provided that they are stainless steel. Annoyingly, these ones came with soap (see green tinge on the one on the right), so I had to carefully wash and dry the pad out to get pure stainless-steel wool (the one on the left):

I then cut little pieces of the wool, and placed them into the copper sheet make-shift clamps with my pads already soldered:


T+21, avg=668, smooth=663
T+19, avg=654, smooth=660
T+21, avg=670, smooth=662
T+19, avg=652, smooth=661
T+22, avg=678, smooth=663
T+19, avg=665, smooth=666
T+21, avg=668, smooth=665
T+19, avg=665, smooth=669
T+21, avg=663, smooth=665
T+19, avg=659, smooth=663
T+21, avg=669, smooth=664
T+20, avg=665, smooth=664
T+19, avg=650, smooth=660
T+20, avg=660, smooth=661
T+22, avg=671, smooth=661
T+20, avg=663, smooth=661
T+18, avg=654, smooth=662
T+22, avg=672, smooth=665
T+19, avg=667, smooth=664
T+21, avg=661, smooth=663
T+19, avg=656, smooth=664
T+21, avg=671, smooth=663

Comments
Post a Comment