Making a Horse Head That Can Wear a Bridle
I intend for the horse riding simulator to allow you to use normal horse tack, and to sense everything it needs to as you interact with it through the tack. This of course includes head-gear, specifically a bit and bridle.
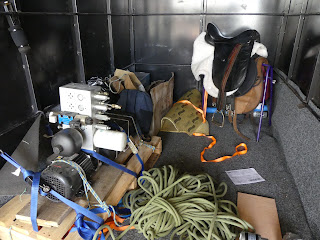
I have an old bit and bridle here, so I will model the head dimensions on that:

1. The bit is 120mm wide, so the head has to be narrower than that at the muzzle end. Probably around 100mm wide would be good.
2. From the bit to the back of the head strap of the bridle to the bit is just under 500mm. Of course this has to allow for some curvature of the head strap, so probably more like 400mm from back of head to where the bit sits in the muzzle.
3. The muzzle strap (whatever it is really called, I'm still really quite a noob when it comes to the finer points of tack) will fit about a 100mm wide x 200mm high muzzle through.
4. The straps either side of the ears look about right for the head to be about 150 -- 180mm wide.
5. With a head about that wide, the chin strap would reach about 250mm below, the straps around the ears about 75mm or so above.
This all means that we need a shape that is approximately a truncated pyramid kind of shape, with a hole for the mouth, and ideally some nice pretend ears, partly for looks, and partly so that the head straps can't fall off easily.
A bit of sketching, and I think I have a simple design that I will be able to fabricate with my limited wood-working skills, yet will still look enough like a horse, and more importantly, will be able to wear a bit and bridle:

Essentially it will be made from two 300mm wide and 500mm long planks of wood, that at the top of the head will be separated by about a 66mm tongue that will be used to attach it to the neck, as well as providing the increased width at the back of the head. I'll use a couple of coach bolts or similar at the top and muzzle ends of the head to hold the planks together, and add a narrower spacer to the muzzle end if required.
I don't have a jigsaw, so I'll either see if one of our neighbours can help me make the cuts for the mouth, including the pocket that will hold the pressure sensors and related padding. If not, then I'll use a hole drill to make most of the cuts, and finish it up with a pile of tedious filing -- or give in and buy a jigsaw.
For connecting the head and neck to the body, I am going to start with only vertical movement, just using a simple door hinge. But I am also thinking about the best way to add the side-ways movement, perhaps using a farm-gate style hinge, that would allow for >45 degrees sideways motion on both sides.
We will buy a bag of leather scraps to make some leather ears, and maybe even have enough leather to cover much of the head, which would look nice.
I know that the head looks a bit goofy still, but that's fine: The purpose right now is to make any head that can wear a real bridle and bit, so that I can use it as the basis for making the sensors for reins use. I fully expect that improved versions of this will be designed by others in this project over time. That's kind of the point.
But back to my "version 0.1" head, with some faux leatherette and other fairly low-cost materials, including some real leather off-cuts for the ears, we have a head that looks plausibly horse-ish, especially when it is wearing the bit and bridle:

(You can see how much I am still learning, because first time around, I put the nose band on the outside of the bit, instead of the other way around).
On the underside of the head, you can see how I have just wrapped the fabric around the two halves of the head, screwed it in place, and stowed the excess in the void between theme:

Meanwhile, after being reminded by my riding instructor that I had the nose band and bit on wrong, I put them in the right places:

It's really nice how it holds on there -- it doesn't feel like it is going to fall off, or the bit fall out. This is partly because I made that extra area at the back of the mouth, where the bit naturally sits down into it, which you can see here:

Next it was time to work on the neck joints. I have used a two-way salon-door hinge to allow the head to be able to turn left or right. This has the advantage that it will self-centre when there is no force applied to pull the head one way or the other. However, the weight of the head is too much for this hinge unassisted, so I have added a trampoline spring to take some of the load:


I thought that that would be enough, but it's still not enough tension to keep the hinge from buckling. More on that in a bit.
Meanwhile, to allow the head to go up and down, I used a normal door hinge on a raised block, which works quite well:

Here we can see both hinges, with the door hinge fully open under gravity, while I held it up for the photo. Normally it will be 90 degrees more closed than this, as can be seen in the following images, when I attached it to the horse frame.


To prevent the head and neck knocking when fully lowered, I fitted a little door stopper on the underside of the neck:


This gets it closer to being balanced, so that the head is not resting on the frame, but still not quite there. I am going to need stronger springs, more springs, or some other method to get this right.
But anyway, I now have a head that can wear bit and bridle attached to the frame, in a plausible location, so that the reins could be used while sitting on it, which was a nice achievement for the day. It's certainly starting to look more "complete" in the sense that it has the important physical parts required to simulate riding, although there is still plenty more to be done.


I ended up totally re-working the neck tension by mounting pulleys to the roof beam of the "stable", as the head is simply way too heavy right now to be suspended with springs along the neck. If I was making the head again, I think I would make it from one of those stiff high-density foams for the most part, to really reduce the weight. That said, with the pulleys and rope, the head can now be positioned wherever I like:

This approach does mean that you have to split the reins when putting on a bridle, because you can't just throw the reins over the horse's head:

While the motion of the head isn't perfect, having it suspended this way does make it quite light to move, and fairly gentle pressure on the reins will cause the head to move to one side or the other. The head also pulses back and forward gently when the body moves, as well, which is kind of nice.
What needs to happen next is that everything needs to be properly aligned from head to tail, so that it is possible to sit in the saddle, and use the reins without the whole thing feeling twisted and lop-sided as it does right now. This should mostly be a case of moving the "spine" pool-noodle and pinning of that to get it properly centred and in-line for how the body sits at the moment. This will just be an interim solution until I get proper actuators for the body, which will be able to ensure proper positioning, and will also be able to actuate the neck as well.


Comments
Post a Comment